Texture... I hear ya. It's a whole thing.
I watched LOTS of YouTubers create amazing furniture with texture for ages and thought "Yep, there's something I'll never be able to do." I just didn't get it. They were adding texture everywhere - sides, tops, drawers...LITERALLY EVERYWHERE.
How can that work? Aren't they worried about texture chipping off? What happens if you go through this whole process of adding texture to your project and when your done it looks like a kindergarten craft project? It might just look like I don't bother with the cleaning portion of prepping a piece for paint.
I had the same reservations you have and I avoided this trend hoping it died a quick and painless death and I could move on with my smooth, soft, buttery finishes. I will tell you though, I watched the videos in relentless fashion and absolutely loved the finished look these furniture artists were creating using texture. The depth, the age; it was truly beautiful.
I thought 'What's the worst that can happen? Maybe I'll just try a little." Full disclosure here, I think I may have developed something of a texture addiction from my first dabble so be aware of that before you dive in too deep.
I chose a piece of furniture that wasn't stirring a ton of inspiration in me and a for which I had a low dollar investment (ya know, self-doubt for the win).

This was a piece that I had painted previously and there had been a significant amount of bleed through from the previous finish. AND, honestly, this is not my style of furniture. It feels a little delicate for my liking. AND I had painted it pink. For the love of all that is wrong in the world, I added to my own distress every time I walked past this table in my shop knowing that it needed to be redone and I was going to have to paint it - AGAIN. It was an easy pick for the texture experiment because it was about five minutes away from being donated.
This time I started it with a coat of primer. Much better plan. It already looked better.

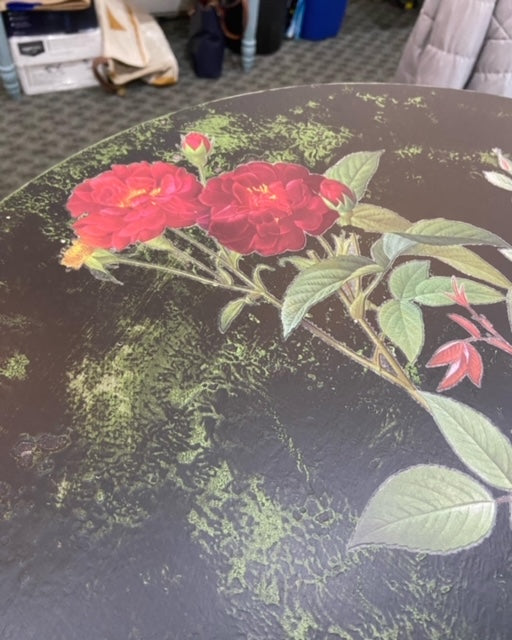
While I was working on this project, I was also preparing to teach a gallery wall class using MudPaint, wet distressing and IOD transfers so I took the same theme I was using for my example gallery wall and used it on this table. MudPaint Grassy Green and Just Black and the IOD Redoute II transfer.
I mixed my Grassy Green with my texture additive. I used Salt Wash (available literally everywhere but here - maybe I should think about adding it). You can make it as thick or as thin as you want. I added thicker texture to the legs and thinner texture to the top. I used a chip brush (a couple actually, they kinda gunk up and are trash in no time) and just dabbled it on as I saw fit. No pressure knowing that I could just abandon this project without repercussions.
Once I had my texture added it was a little scary looking. I let it dry overnight and then gave the whole table a quick coat of Grassy Green.
NOTE - I have exactly zero pictures of this so don't consider me your only source of texture. I fail regularly and this is just another one of the plethora of examples to choose from on a single day in history. Don't judge - I'll do it myself thank you.
Once my Grassy Green coat was dry I added a coat of Just Black. This paint is highly pigmented so one coat gave me full coverage over the green.
Once dry, I took a sanding block and just lightly sanded down the peaks in the texture. It brought a lot of the Grassy Green back through and it was actually looking pretty good, but because my upcoming class had a focus on wet distressing, I wanted to see what would happen if I added moisture. Will this just turn into an oatmeal mess? Answer - it absolutely can so proceed with caution. I tried adding the water via a spray bottle to the surface and then rubbing back and that was a touch too much. I ended up just wiping texture and much of the paint off of those areas. Note the strategic placement of the transfer over areas that were a little soupy and therefore removed.
What did work really well was adding water to my rag and then rubbing back the paint until I achieved the look I wanted. MudPaint is a clay based paint which makes wet distressing a real possibility with it. You may find that your chalk mineral paints don't wet distress as nicely. You can continue to use the sanding block rather than water if you've used something other than a clay based paint.
Any who, I LOVED the look I achieved using texture. So much so that I am adding texture to another piece right now. Check out my final results on this little throw away table. I couldn't love it anymore!

